How to Repair Small Drywall Holes Before Painting
A small wall hole can be an ordinary cosmetic repair—or a sign of a bigger problem. Identify the damage before buying filler.
Assess the wall before calling the damage cosmetic
A picture hook hole, a shallow indentation and an opening that exposes broken board are different repair conditions. First look at the location, the surrounding surface and whether the damage is dry and stable. Do not assume a patch is appropriate when the wall is wet, soft, repeatedly cracking or showing evidence of movement. Moisture stains near plumbing, windows or a roof should be investigated rather than hidden under compound and paint. Similarly, loose board or a large damaged section may call for proper backing, board replacement or qualified repair. For an ordinary small cosmetic defect, note whether the wall is standard drywall, plaster or another substrate. Product names can be confusing: a generic tube of spackling compound is not a substitute for any required wall-board repair system. A useful beginning is to photograph and measure the actual opening, inspect the surface without disturbing suspicious old coatings, then check the manufacturer's instructions for the relevant repair material. The goal is a durable and visually consistent repair, not merely covering the hole as quickly as possible.
USG differentiates small dents from larger openings
The USG Sheetrock repair-kit guidance distinguishes small holes, dents and cracks from medium openings that require different techniques. For the smallest suitable defects, a compatible patching compound applied to clean material may be enough. Larger openings can require a reinforcement patch, tape, a specific compound or another approved repair assembly. The choice depends on measured dimensions, condition, product instructions and whether the surrounding board is sound. Do not apply one generic method to every opening. A large hole where someone struck the wall may contain damaged material beyond the obvious edges. A patch that merely bridges the face is not automatically strong enough for heavy attachments or a required fire-rated partition. Always check whether a wall is part of a specified fire, sound or moisture-control system. In those cases, a superficial cosmetic patch may not restore the required assembly performance. Get appropriate professional advice where the function of the wall is uncertain.
Product choice: filler, repair patch and joint compound
Small stable nail holes and shallow dents may be repaired with a suitable lightweight filling product when its instructions permit the substrate and size. A deeper or wider opening may need a manufacturer-approved reinforcing patch. Joint compound is used with appropriate tape or patches in many drywall repairs, but product setting and drying characteristics differ. Premixed drying compound, setting-type compound and specialized fillers should not be treated as interchangeable just because all become hard after application. Read working time, temperature, maximum recommended fill depth, number of coats and sanding or recoating conditions. Products can shrink, require additional passes or react differently beneath paint. The USG document describes separate steps for its specific repair kits, not a universal specification for every retail brand. A buyer who selects the wrong material may spend more time redoing an uneven patch than was saved by buying the first available tub. If in doubt, refer to the complete manufacturer method for the identified damage size and substrate.

Surface preparation should not spread the damage
Protect the surrounding room, remove movable items and identify surfaces that could be damaged by dust or compound. Within the manufacturer's recommendations, loose material may need appropriate removal and the repair area may need cleaning. Avoid widening a small crack or aggressively sanding old paint simply to make a repair feel substantial. The US Environmental Protection Agency warns that renovation and paint disturbance in pre-1978 housing can create dangerous lead dust. EPA recommends certified lead-safe help for relevant projects and offers specific DIY safety information. The age and history of the building therefore belong in the project checklist before sanding, drilling or scraping. If a wall may contain lead paint or another hazardous material, pause and obtain the appropriate assessment. Do not tell a reader that wearing a generic dust mask makes any paint-removal technique safe. Even modern repairs can generate nuisance or hazardous dust depending on materials. Follow the product safety data, appropriate ventilation and protective equipment guidance, and avoid spreading debris into occupied areas.
A controlled patching workflow for suitable minor damage
For a small, confirmed cosmetic defect, identify the approved product and follow its instructions for cleaning and application. Work in controlled thin passes where required rather than assuming one thick layer will be faster. Let the repair set or dry for the time specified by that exact product. Some materials require another coat; others have their own mixing and working-time limitations. Inspect the result under light from the side, which can reveal raised edges that disappear when the wall is viewed straight on. Where permitted and safe, finish the repaired surface as the manufacturer directs before applying an appropriate primer and paint. USG's repair guide discusses adding compound where necessary, sanding when suitable and priming the dry repaired area. The product's directions should determine how soon each step can occur. A rushed repair may look smooth before finishing but reveal a ridge after paint. A careful process avoids overworking material that is still soft or contaminating the surface before primer. This is guidance for limited cosmetic repair, not instructions for rebuilding structural or regulated wall assemblies.
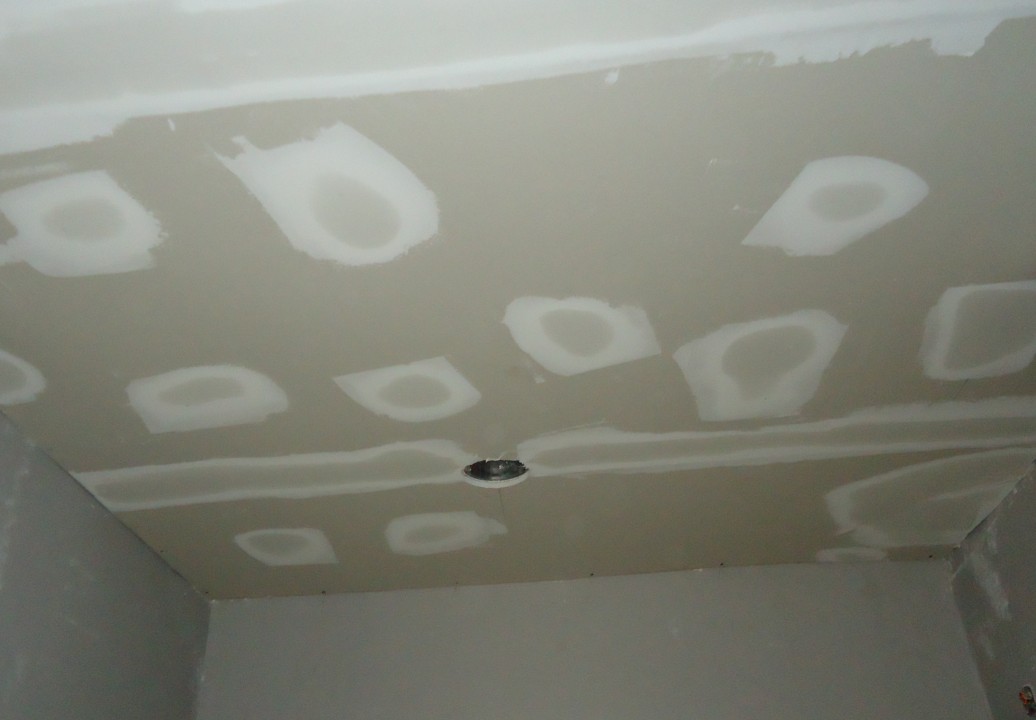
Why patched spots can flash through fresh paint
A repair can be technically filled while still looking different from its surroundings. Porosity, surface texture and reflected light influence the appearance of a painted patch. Unprimed filler can absorb finish paint differently from the existing coated wall, leaving a visible spot under some lighting conditions. Check the repair compound and paint manufacturer's recommendation for sealing and priming. Painting only a very small patch may also leave a visible color or sheen difference on an aged wall even when the original paint name is known. The practical choice may be to prime the repaired area and repaint a larger visually continuous surface when the homeowner wants uniform appearance. There is no universal rule that two tiny patches always require an entire room to be repainted. Evaluate the existing finish, color matching, light and the intended standard of appearance. For a completed planning example, compare the bedroom surface-preparation and paint guide with our paint sheen and finish selection guide. Follow the actual product label, then use the Paint Calculator to calculate an appropriate wall-paint order. Do not treat the estimated amount of finish paint as a repair-compound yield.

Worked example: how a repair affects paint quantities
Imagine a sound wall twelve feet wide and eight feet tall with three small cosmetic patches. The wall's area is 96 square feet. Suppose the owner wants to repaint the complete wall after the patches are properly prepared. At two coats and a hypothetical finish-paint coverage of 320 square feet per gallon per coat, the quantity is 96 × 2 ÷ 320, or 0.60 gallon. If only whole one-gallon cans are available, one gallon is the arithmetic purchase quantity before any separately justified allowance. This does not specify patch compound, primer or an actual brand's coverage. If the wall were fifteen feet wide at the same height, it would be 120 square feet, and two coats under the same assumed coverage would require 0.75 gallon. Both examples round to one whole gallon in this packaging scenario. Extra patches do not automatically change the whole-wall paint area, but they may change primer needs and preparation time. Track the surfaces and products separately, because multiplying by a generic waste percentage can hide double counting. Local prices, actual coating yields and the repaired finish determine the real cost.
Small shopping basket and a transparent budget
For a hypothetical simple project, suppose a suitable repair product costs $12, a repair accessory kit $9, a compatible primer container $17, a gallon of finish paint $39 and protective supplies $14. These invented line items sum to $91 before tax, delivery and any tools the homeowner lacks. This is not a current store quote or a recommendation to purchase all five items for every hole. A tiny cosmetic nail mark may need fewer supplies, while a larger damaged area might demand an entirely different method and professional labor. A comparable contractor proposal should identify surface repair scope, number of locations, preparation, protection, primer, finish coats and cleanup. If moisture remediation or restoration of a rated wall assembly is required, that belongs outside the cosmetic budget. Use the Project Budget Workspace to keep material and labor decisions clear. Do not invent a cost-per-hole average from this example: hole size, access, substrate and the desired final finish make a single average unreliable.
When DIY stops being a good option
Seek help when damage returns after repair, board is loose, there is significant water staining, mold is suspected, electrical or plumbing systems may have been affected, or a wall has a fire-protection function that needs restoration. The same applies when the existing paint is of uncertain composition and might involve hazardous disturbance. For renters, establish the permission and responsibility for the work before modifying the surface. Avoid cutting into a wall simply to investigate hidden services without suitable expertise. A repair should leave the wall safe and appropriate for its original role. A smooth surface alone does not prove that concealed damage was resolved. If the job instead involves replacing sheets across a substantial wall, our Drywall Calculator estimates board quantities from wall area and chosen sheet dimensions. That is a different project from patching a small hole; don't use sheet quantities as a proxy for the right patching method.
A final check before the wall is considered finished
Inspect the repaired area under typical daylight and interior lighting. Check that the patch is dry as specified, the primer and paint match the approved coating system and no cracking or stain has returned. Clean up according to the material instructions and any applicable safety rules. Save the product label or notes about the finish for future touchups, especially where the exact sheen is important. A documented repair can help avoid repeated guesswork. The most useful habit is to match each step to a known condition. A tiny dry nail hole, an impact-damaged sheet and a wet discolored surface are not three versions of the same project. Choosing appropriate help or delaying cosmetic work can be the better financial decision when the cause is uncertain. Treat manufacturer instructions and official EPA safety information as the governing references; this article is a planning and small-repair guide, not a substitute for an onsite inspection.
Editorial and safety notice
Repair techniques must follow the material manufacturer's instructions. Product prices and dimensions are illustrative, not published field-test results or store quotes. Older painted surfaces and damaged assemblies can require professional evaluation. Consult our methodology.
Use a three-photo patch record to avoid chasing the same defect twice
For each small area you plan to repair, take a wide photo that locates the hole, a close-up with its edge visible, and a photo after suitable preparation. Write down whether the surrounding wall sounds solid, whether there is a crack that continues beyond the impact, whether the face paper is torn or the gypsum core is exposed, and whether previous paint is sound. A thumbtack hole in stable paint is not the same scope as a dent at a door handle or a patch that keeps cracking along a seam. If the area is wet, soft, warm, discolored by a leak, or close to suspected electrical or plumbing services, do not treat it as routine cosmetic filler.
For approved minor repairs, the repair-product instructions determine application thickness, number of passes and drying. Many fillers shrink or need a second pass, and a large mound of material takes more work to flatten than a controlled thin application. Make a small, protected test first if the original wall texture is unusual. Wear protective equipment appropriate to the product and dust exposure, isolate the work from occupied rooms and use sanding methods that control dust rather than dispersing it through the home.
| Checkpoint | Pass means | If it fails |
|---|---|---|
| Substrate | Dry, stable and compatible with the approved patch system | Investigate moisture, loose board or damaged paper; don't conceal it. |
| Edge transition | No obvious ridge under appropriate side-light after drying and permitted smoothing | Correct a small edge or texture mismatch before painting a whole wall. |
| Primer decision | Chosen primer specifically suits repaired/porous areas and later paint | Confirm a complete coating system with the manufacturer. |
| Final appearance | Patch reviewed at normal viewing distance in daylight and room lighting | Reassess sheen, texture and paint blending rather than adding arbitrary coats. |
A cost comparison that includes the price of doing it again
Compare three scope lines separately: materials for the physical hole, materials for surface priming, and paint needed for the visible finish area. A tiny hole may require just a small amount of filler but still force a broader touch-up or wall repaint because an aged wall color is hard to match. Reusing an old open paint can is sensible only when its condition, compatibility, color and finish are confirmed. Treat quantities in product packaging as purchase decisions, not proof you need to empty the container into the hole.
Make two candidate budgets: A covers the approved patch and a test blend; B covers patching, primer and repainting the entire wall plane when the touch-up remains visible. Include protection, patch compound, abrasive or alternative smoothing method, primer, brushes/rollers, cleaning and disposal. Take a final after-photo under the same light as the before-photo. If the patch reopens, paint bubbles or staining returns, the additional expense is not another tube of filler—it is finding and correcting the cause. Homes with older suspect coatings may require lead-safe evaluation before scraping or sanding; location and building age matter, and uncertain hazardous materials call for professional advice.